SLP2 (StereoPi Livestream Playground v2)
Contents
- 1 Quickstart
- 2 Menu structure
Quickstart
1,5 minutes video of SLP2 interface
To get a feel of the interface, you can take a look at this 1.5 minutes video on YouTube.
Where can I get SLP2?
If you have got the StereoPi v2 Camera Kit, you have a micro SD with the SLP2.
You can also download the SLP2 image here.
The number of the latest SLP2 firmware version can be found here.
The latest update of SLP2 can be downloaded here.
How to access the configuration file
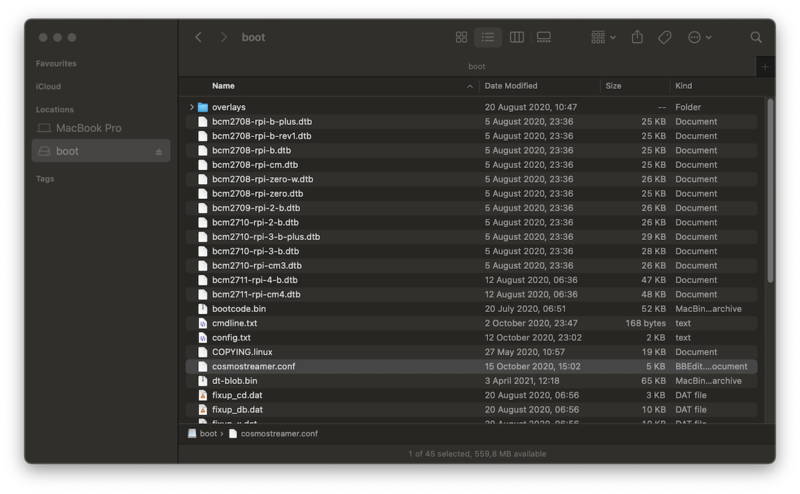
StereoPi settings are stored in the "cosmostreamer.conf" file. This file is located in the "boot" folder of the micro SD card with SLP2. You can connect the micro SD card to your computer using a micro SD cardreader, and this disk will be mounted to your computer.
Please remember to save your changes and do the correct ejection of this drive.
Connection setup
Ethernet
By default, you can use Ethernet connectivity out-of-the-box without any additional configuring. Plug in an Ethernet cable, and you are connected.
WiFi access point
SLP2 has pre-configured access point mode by default. That is after the first boot, you should see an access point named "Cosmostreamer." Use the "1234512345" password to access it. You can change the access point name and password in the configuration file "cosmostreamer.conf" in the /boot partition of the micro SD card (or eMMC). Here is how this section looks like:
# Wi-Fi access point interface
# disabled if empty, int - Internal Wi-Fi, ext - External USB Wi-Fi
ap_iface=int

# Wi-Fi access point SSID
ap_ssid="cosmostreamer"

# Wi-Fi access point password
ap_psk="1234512345"`
Examples:
To disable access point use:
ap_iface=
To enable access point using internal WiFi installed on CM4 use:
ap_iface=int
To enable access point using external WiFi (USB dongle) use:
ap_iface=ext
Note: please check that your USB WiFi dongle supports AP mode and that RaspiOS support the dongle's chipset!
WiFI connection to router
If you want StereoPi to connect to your WiFi router, you should disable the AP mode (see the previous section) first.
To do this, open the "cosmostreamer.conf" file in the /boot partition, and find this section:
# Wi-Fi access point interface
# disabled if empty, int - Internal Wi-Fi, ext - External USB Wi-Fi
ap_iface=int
Please change "ap_iface=int" to "ap_iface=". Now internal access point is disabled.
Now let's configure the access to your router.
Find this section in the configuration file:
# Wi-Fi network interface
# disabled if empty, int - Internal Wi-Fi, ext - External USB Wi-Fi
wifi_iface=

# Wi-Fi network SSID
wifi_ssid=""
# Wi-Fi network password
wifi_psk=""
Choose CM4's WiFi by modifying the first row to "wifi_iface=int" and add your access point credentials. For example, to connect StereoPi v2 to the Mars_colony_17 access point with the password total_recall! use these settings:
# Wi-Fi network interface
# disabled if empty, int - Internal Wi-Fi, ext - External USB Wi-Fi
wifi_iface=int

# Wi-Fi network SSID
wifi_ssid="Mars_colony_17"
# Wi-Fi network password
wifi_psk="total_recall!"
How to access StereoPi
Under Windows10 and MacOS you can type this address in the browser
stereopi.local
If you are using the StereoPi access point, you can use direct access to this address:
192.168.50.1
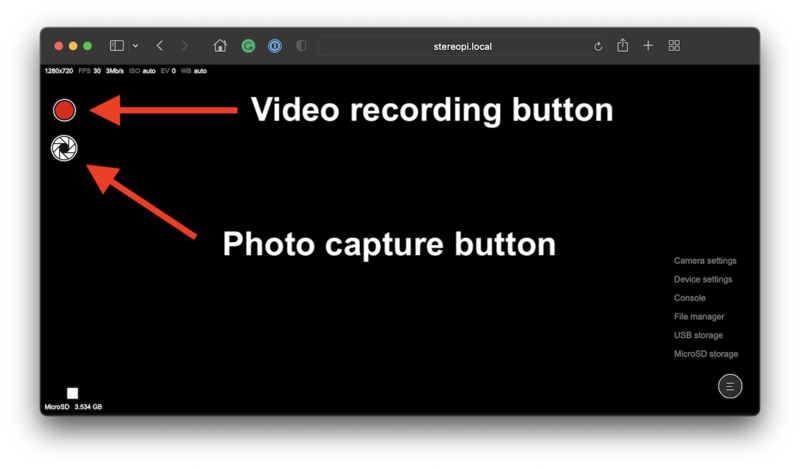
Making photo/video
Accessing photo/video
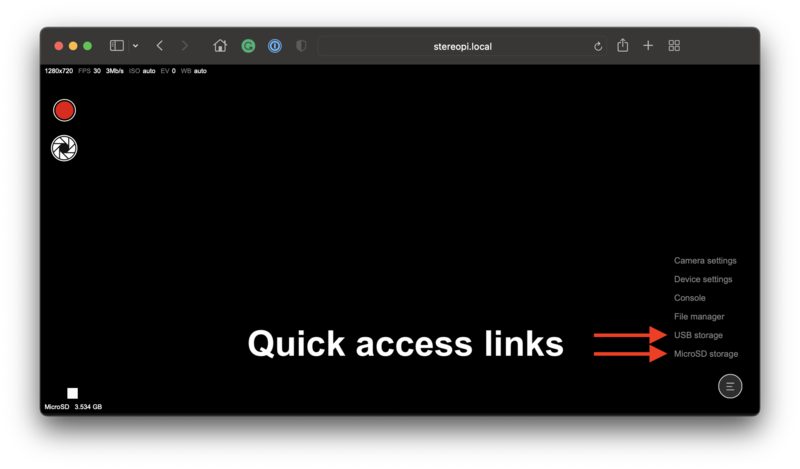
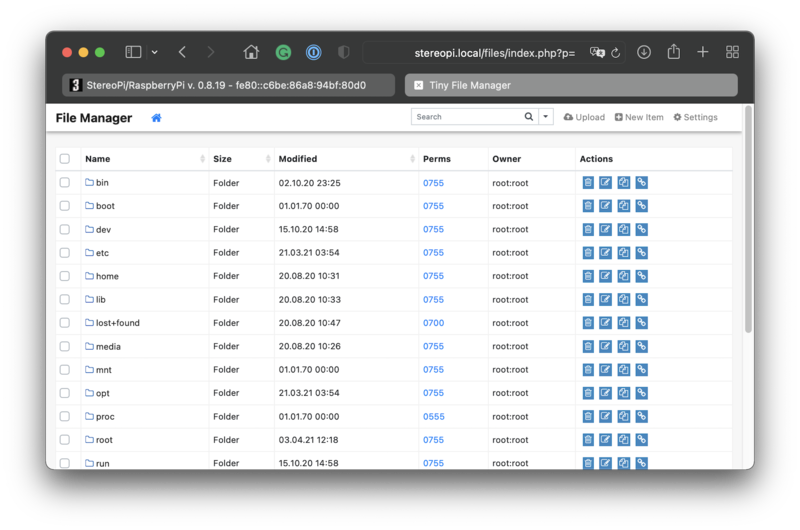
To find all photos and videos click on the menu icon at the right bottom corner and choose "Micro SD storage". You'll see the File Manager window. All your images and videos are saved in the DCIM folder.
If you configured SLP2 to store files at the USB dongle, please choose "USB storage" in this menu.
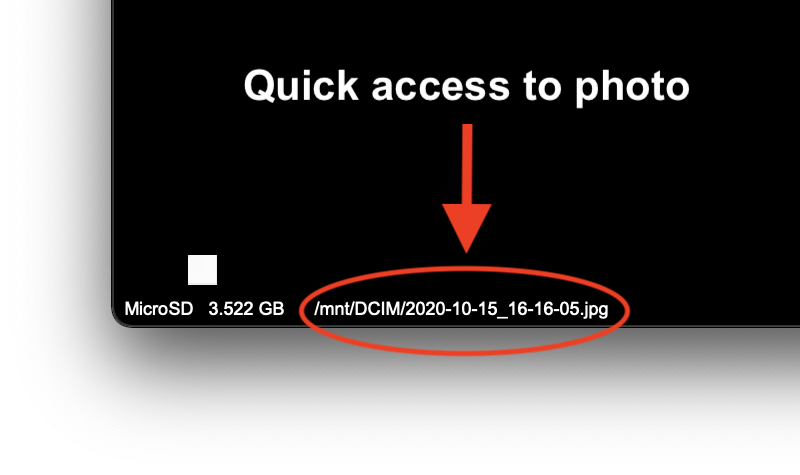
If you want to take a quick look at the latest image captured, you can use the direct link to it.
This link appears at the bottom-left corner right after the image capture. Click on it will open a new browser tab with the taken image.
Updating SLP2
The number of the latest version of SLP2 firmware can be found here.
The latest update of SLP2 can be downloaded here.
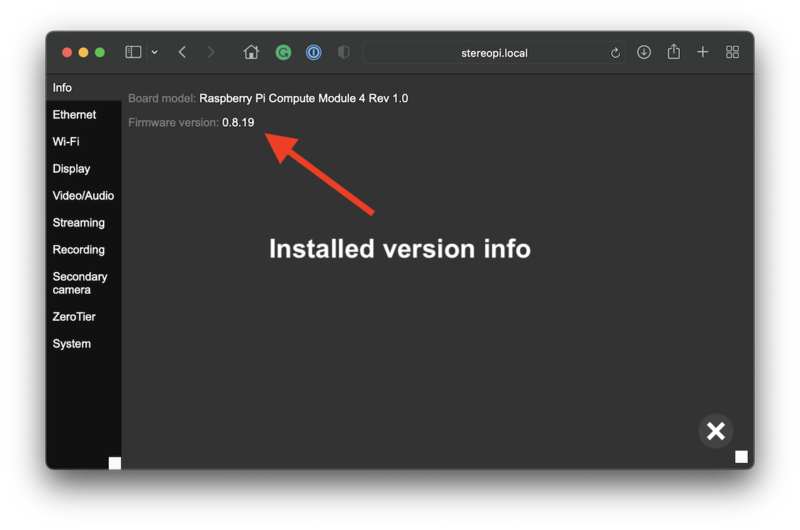
To find the current version installed go to "Menu -> Device settings -> Info".
To update SLP2 to the latest version go to "Menu -> Device settings -> System".
Menu structure
Camera settings
Camera
Cams detected x, supported x
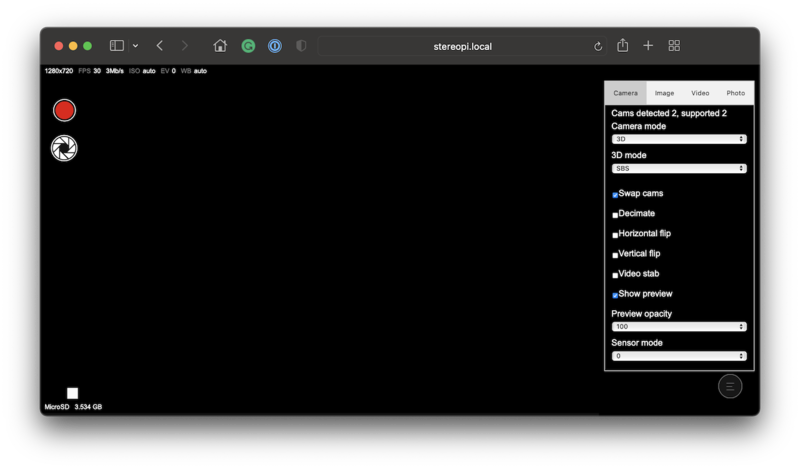
At the very top of the menu, you can see the text "cams detected 2, supported 2"
supported 2x means that the system is configured correctly and "knows" about 2 cameras. This literally means that the dt-blob.file in the /boot partition has information about this.
detected 2 means that the system detected both cameras. If you see "detected 1" or "detected 1", this usually means one of your cameras has connection issues. Check the ribbon cable connection on the StereoPi side and the camera side.
Camera mode
In this drop-down list, you can choose either "3D" or "2D". "3D" means stereoscopic mode, and "2D" regular mode using just a single camera.
3D mode
SBS means "side-by-side". Both images are stitched together by their sides in this mode - one at the left and another at the right.
TB means "top-bottom". In this case, images are stitched together by their top and bottom - one at the top and another at the bottom.
Swap cams
By choosing this checkbox, you will swap left and right images. This option affects both photos and videos.
Decimate
A tricky but useful feature for specific cases.
Imagine you have 1280x720 resolution for each camera. When you request the stereoscopic frame, the system takes 640x720 from the first camera by cropping it and 640x720 from the second camera by cropping to. After that, these "cropped" images are stitched together into one 1280x720 frame. I.e., in this case, you are losing the field of view. This is "no decimate" mode, turned on by default.
If you turn on "decimate", the system will scale each image horizontally from 1280x720 to 640x720 instead of cropping it. Thus you have the full FOV for each camera. But you will need to do the x2 scaling back to view the image with the correct side ratio. For example, YouTube is doing this trick for stereoscopic videos by default.
Horizontal flip
Flips both images horizontally. Under the hood, this checkbox is adding the "-hf" key to the raspivid parameters.
Vertical flip
Flips both images vertically. Under the hood, this checkbox is adding the "-vf" key to the raspivid parameters.
Video stab
Video stabilization mode. This mode decreases the FOV, please note. Under the hood, this checkbox is adding the "-vs" key to the raspivid parameters.
Show preview
This option affects HDMI output only. This mode helps to preview the video and see the console output at the HDMI screen for advanced implementation.
Preview opacity
Sets the video preview opacity for the HDMI output.
Sensor mode
You can force the sensor mode for advanced implementation. However, please note that you can hang the system with the wrong settings. To understand the specific sensor mode, please take a look at the official Raspberry Pi Documentation. Search for -md in this documentation to found the Sensor Mode info.
Image
For more details on camera options and command line keys mentioned please refer to the official Raspberry Pi Foundation documentation for the camera.
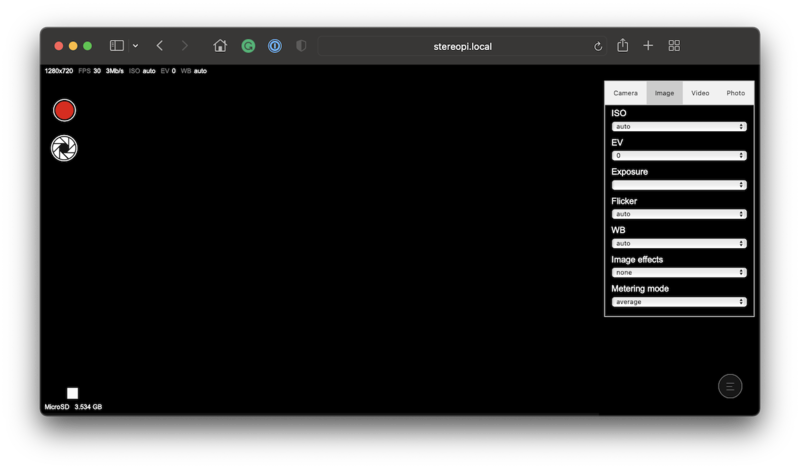
ISO
Sets the ISO to be used for captures. This option adds -ISO key to the raspivid/raspistill with the selected value.
EV
Sets the EV value (exposure compensation). -ev key is used under the hood.
Exposure
Sets exposure mode. -ex key is used under the hood.
Flicker
Set a mode to compensate for lights flickering at the mains frequency. 50Hz/60Hz/auto/off options are available.
-fli key is used under the hood.
WB
White Balance mode. -awb key is used under the hood.
Image effects
This option sets the image effect to be used. Please note that not all effects are supported in the stereoscopic mode.
-ifx key is used under the hood.
Metering mode
Sets metering mode for the automatic contrast/brightness adjustment.
-mm key is used under the hood.
Video
For more details on camera options and command line keys mentioned, please refer to the official Raspberry Pi Foundation documentation for the camera.
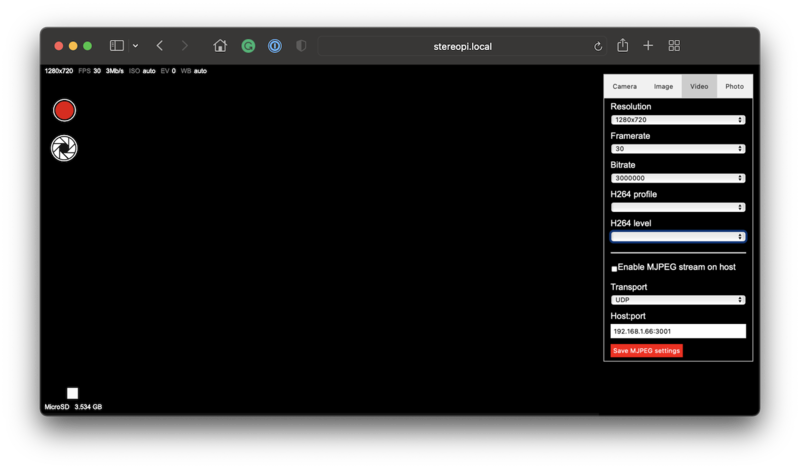
Resolution
Sets the video resolution. -w and -h keys are used under the hood.
Fremerate
Sets the video framerate. -fps key is used under the hood.
Please keep in mind the H264 video encoder limits while adjusting these settings. I.e., do not try to set 100FPS for the FullHD mode.
Recommended settings:
- up to 60 FPS for the 1280x720
- up to 42 FPS for the 1920x1080
Bitrate
Sets the video bitrate in bits. So, for example, 3000000 means 3Mbit. -b key is used under the hood.
If you are doing the video live stream, please take into account your Internet bandwidth limits. For example, if you set 20Mbit while using the 3G connection, you'll get the "broken" video with many artifacts.
H264 profile
This setting is for advanced users. Keep it as is if you don't know what to do.
-pf key is used under the hood.
H264 level
This setting is for advanced users. Keep it as is if you don't know what to do.
-lev key is used under the hood.
Enable MJPEG stream on host
This setting is for advanced users. You can use MJPEG compression instead of H264 and stream the video to the host and port specified.
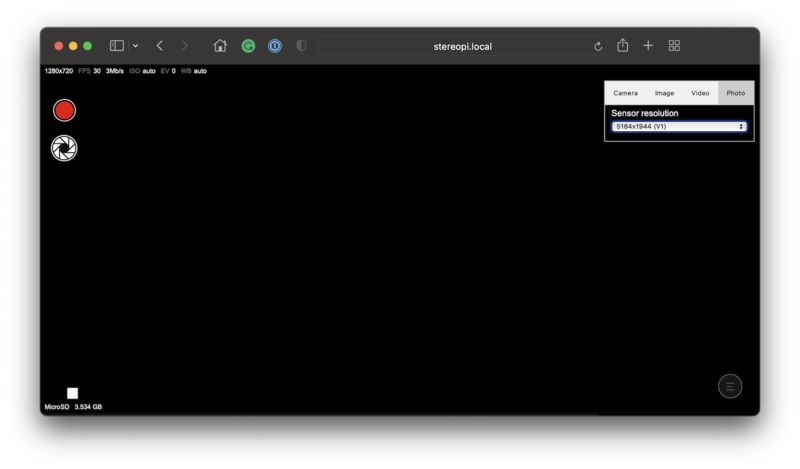
Photo
In this section, you can use the photo resolution.
Please note that you can choose a resolution higher than supported by the camera. In this case, the captured image will be upscaled to the requested size. However, we are not recommending doing this, as in this case, you are getting the "fake" resolution.
Available options are:
- 5184x1944(V1) - recommended for the V1 cameras based on OV5647 sensors. You'll get the 10Mpix image.
- 6560x2464(V2) - recommended for the V2 cameras based on IMX219 sensors. You'll get the 16Mpix image.
- 8112x3040(HQ) - recommended for the HQ cameras, based on IMX477 sensors. You'll get the 24Mpix image.
Device settings
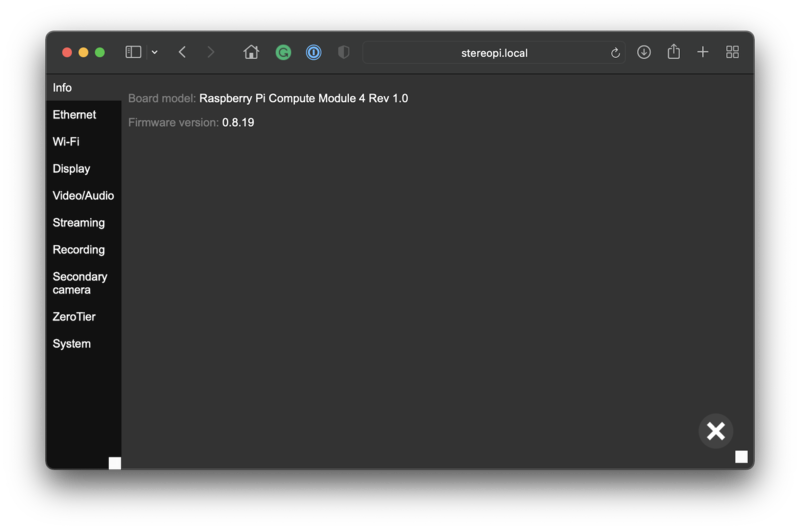
Info
In this tab, you can find the Raspberry Pi model detected and SLP2 firmware version information.
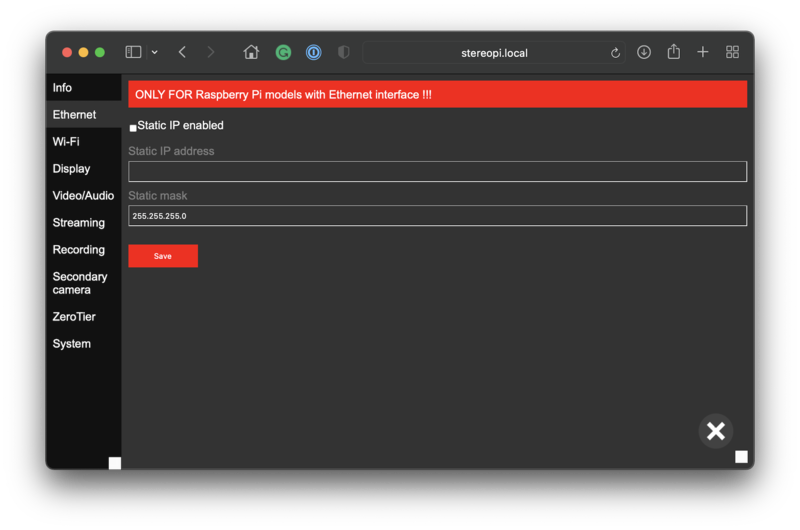
Ethernet
By default, Ethernet is configured to get an IP address by DHCP. If you wish to set a fixed IP address for the StereoPi Ethernet connection, you can put your settings here.
Please note you can also do this in the cosmostreamer.conf file in the /boot partition.
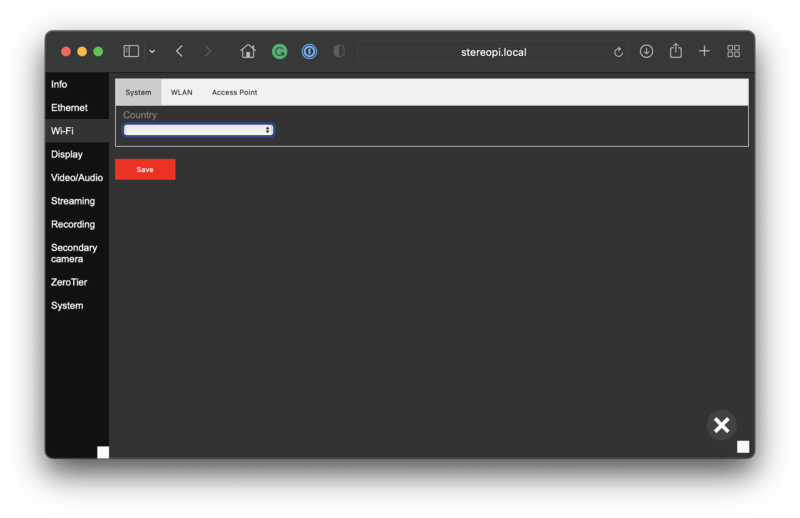
WiFi
System
Note: to adjust the WiFi setting using this tab, please connect to the StereoPi v2 using Ethernet!
In this tab, you can choose the country for the WiFi settings. This option is needed if you have some specific WiFi regulation rules in your country and special WiFi frequency bands. You can find only 3 options here: 00, US and CN. Please do not change this option if your WiFi connection works fine.
For the advanced settings, please use the cosmostreamer.conf file in the boot partition. You can set the country using the country code in this section of the file:
# Wi-Fi system country code
system_country=
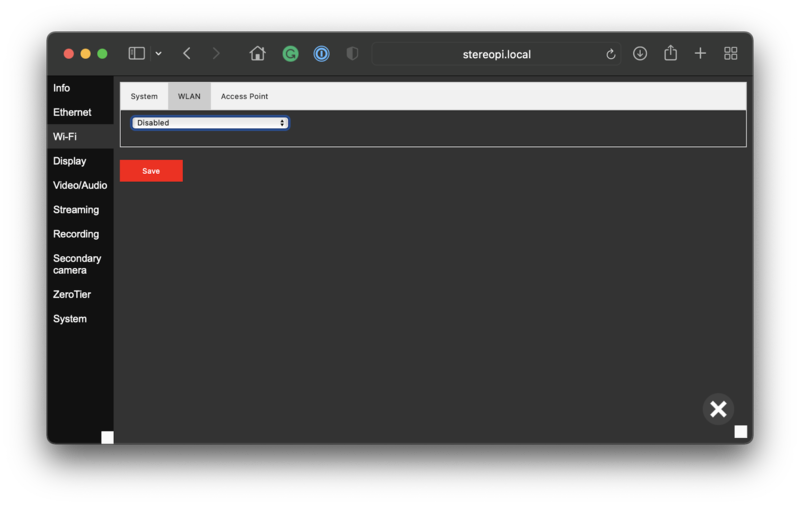
WLAN
Note: to adjust the WiFi setting using this tab, please connect to the StereoPi v2 using Ethernet!
In this tab, you can choose the WiFi interface to use for the connection to the WiFi router.
Available options are:
- disable
In this case, StereoPi won't try to connect to the WiFi router.
- Internal WiFi
In this case the built-in WiFi module of the CM4 will be used.
- USB WiFi
WiFi USB dongle will be used for this connection.
If you are using USB WiFi dongle, please make sure it's supported by RaspiOS!
You can also change these settings in the cosmostreamer.conf file in this section:
# Wi-Fi network interface
# disabled if empty, int - Internal Wi-Fi, ext - External USB Wi-Fi
wifi_iface=
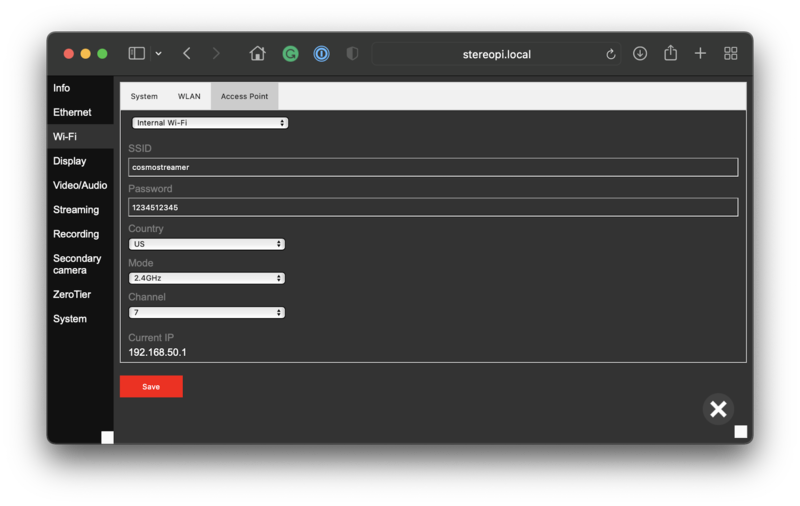
Access point
Note: to adjust the WiFi setting using this tab, please connect to the StereoPi v2 using Ethernet!
In the first drop-down list, you can choose the WiFi module to be used.
Available options are:
- disable
In this case, StereoPi won't try to connect to the WiFi router.
- Internal WiFi
In this case, the system will use the built-in WiFi module of the CM4.
- USB WiFi
WiFi USB dongle will be used for this connection.
If you are using a USB WiFi dongle, please make sure RaspiOS support it!
SSID
You can set the Access Point name here.
Password
Set the password for your access point.
Country
In this field, you can choose the country for the Access Point. This option is needed if you have specific WiFi regulation rules in your country and special WiFi frequency bands. You can find only 3 options here: EU, US, and CN. Please do not change this option if your WiFi connection works fine.
Mode
You can choose 2.4GHz or 5GHz mode for your Access Point.
Channel
You can choose the WiFi channel to be used.
Current IP
Here you can find the current IP address of the StereoPi in the Access Point mode.
Please note you can also set all these options in the cosmostreamer.conf file in the /boot partition. Please use this section of the file:
# Wi-Fi access point interface
# disabled if empty, int - Internal Wi-Fi, ext - External USB Wi-Fi
ap_iface=int

# Wi-Fi access point SSID
ap_ssid="cosmostreamer"

# Wi-Fi access point password
ap_psk="1234512345"

# Wi-Fi access point mode
# 2 - 2.4GHz, 5 - 5GHz
ap_mode=2

# Wi-Fi access point channel
ap_channel=7

# Wi-Fi access point country
ap_country=US
Display
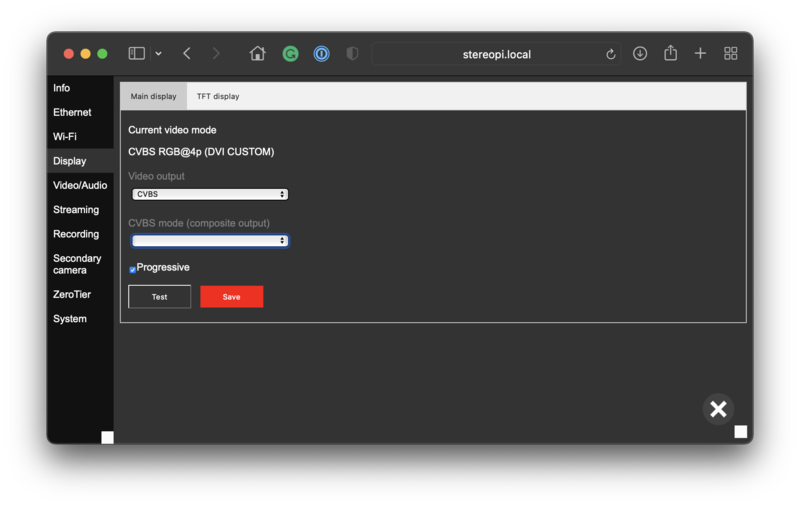
Main display
This tab is for advanced users. You can set the specific settings for the HDMI output. This mode is useful for special cases when you are capturing the HDMI output of the StereoPi.
TFT display
In this tab, you can choose the display connected to the StereoPi GPIO header.
If you are an owner of the StereoPi v2 Camera Kit, please choose 2" display here.
A note for the advanced users: we are using the pre-compiled fbcp-ili9341 library to copy the HDMI output buffer to the screen buffer.
Video/audio
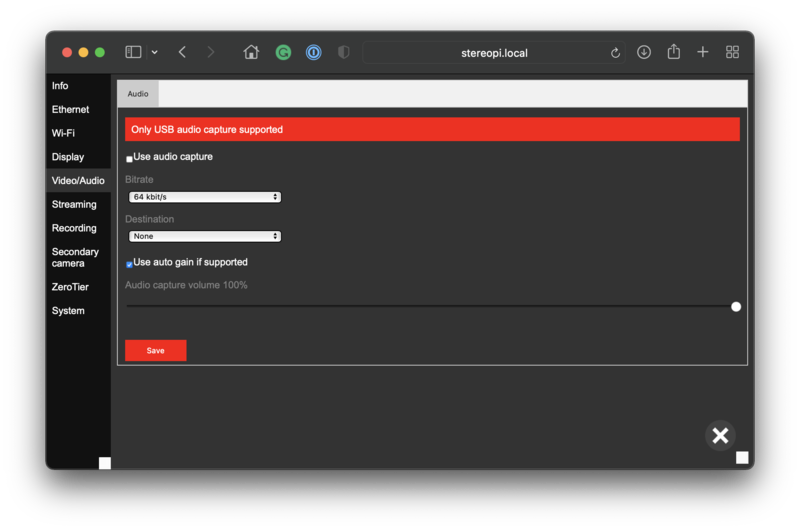
If you connect a USB audio capture device supported by RaspiOS, you can record the video files with the audio.
Streaming
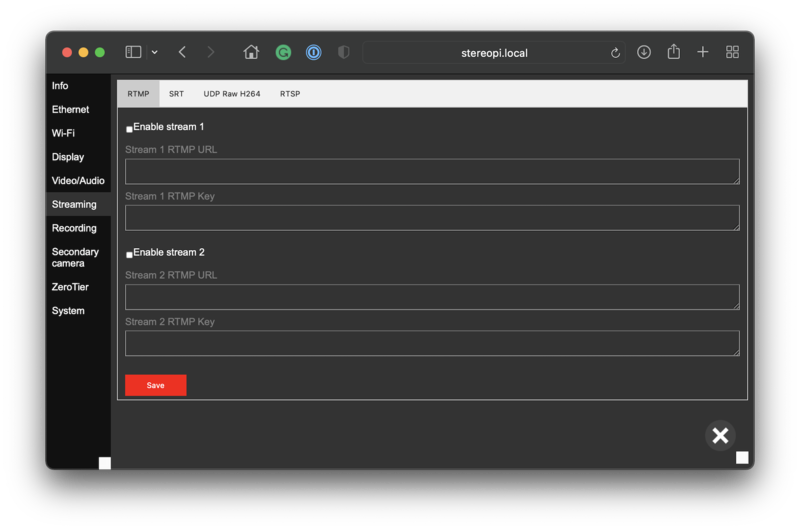
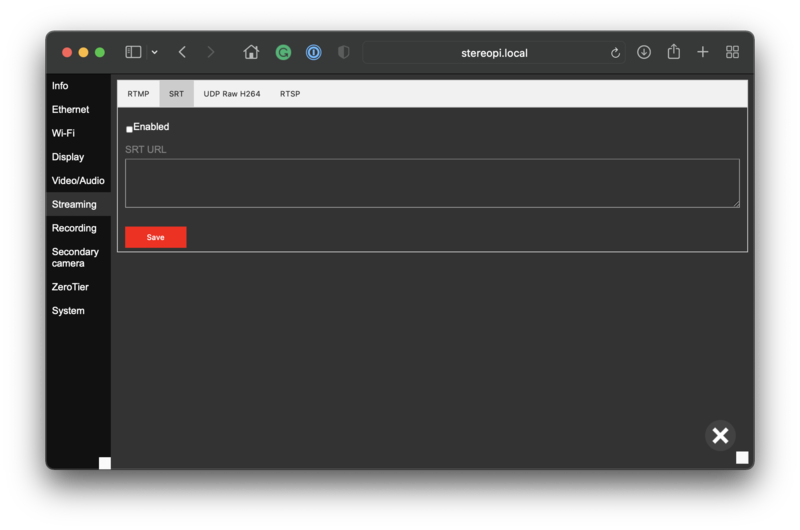
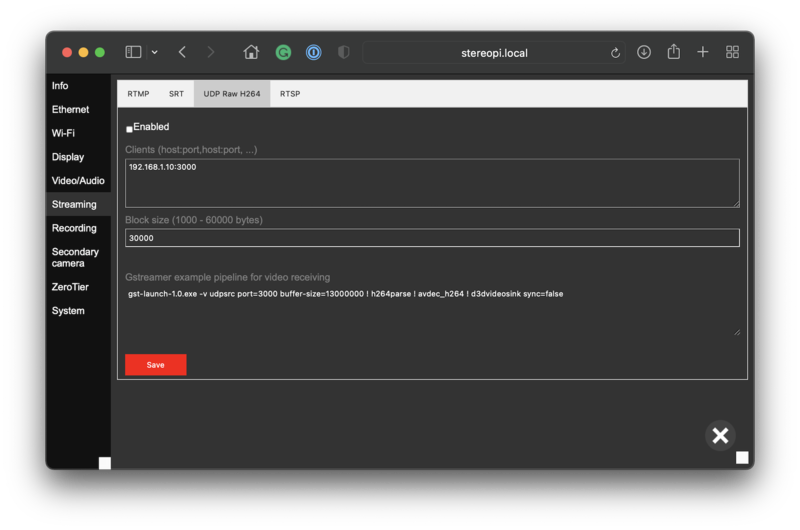
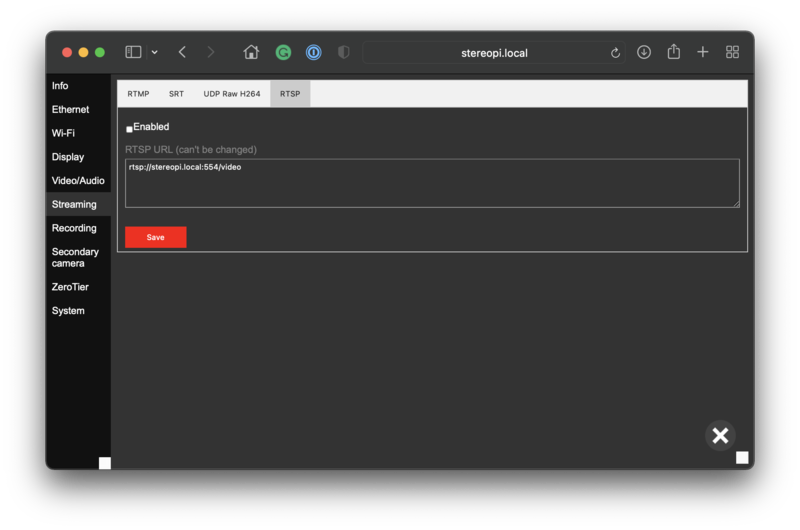
Using this section window, you can set up the video live stream options.
RTMP
By putting RTMP URL and a key, you set up the RTMP stream. So, for example, you can stream to YouTube.
SRT
Here you can set up the SRT video stream.
UDP RAW H264
RAW H264 video live stream using UDP is the fastest and low-latency way to transfer the video. Using this settings tab, you can set up the list of clients for the UDP video live stream.
On this page, you can find an example row for the GStreamer pipeline to receive this stream.
RTSP
RTSP is a prevalent protocol in the world of IP cameras. If you turn this protocol support on, you can access your StereoPi using the RTSP from a lot of software. Furthermore, RTSP URL has been generated automatically, so you can copy it and paste it to the viewer software you are using.
Recording
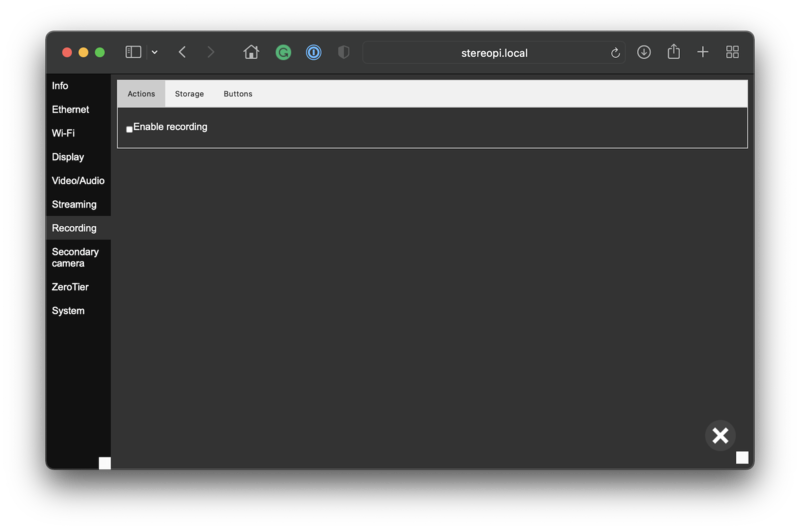
Actions
If you check this checkbox and press "Save" in the Buttons tab, the video recording will start automatically as soon as the system boots.
The system won't start the automatic video recording after the boot process if the checkbox is unchecked.
Please note, this checkbox does not affect the functionality of the "Video record" button on the main screen or the physical "Record" button. The only purpose of this option is starting of the video recording right after the system boot. You can always stop the recording using the "Stop record" button on the main page of the administration panel.
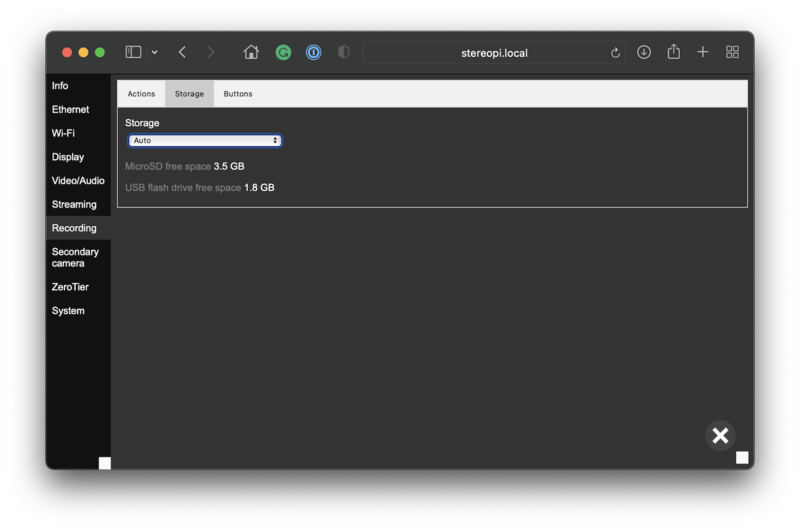
Storage
You can choose the storage to be used for the photos and video records.
Auto
A micro SD card will be used if no USB drive is detected, and a USB drive if it was detected.
MicroSD
All photos and videos will be recorded to the micro SD even if a USB flash drive is detected.
Note: At the very first boot, SLP2 formats all free space of the micro SD card to FAT32 and use this partition for the storage. It means you can connect this micro SD card to your computer using a card reader and can access all your photos and videos.
USB flash drive
Force the system to use a USB flash drive only for the captured content storage. No records will be saved if the USB drive is not detected.
Buttons
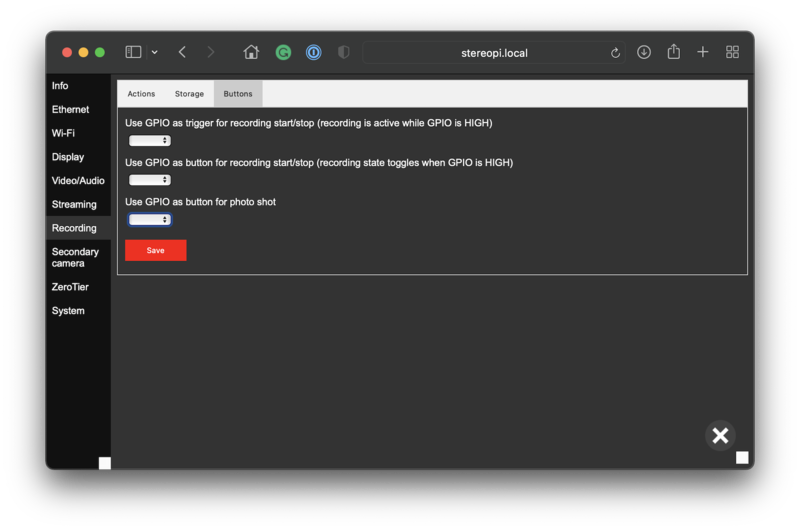
In this section, you can set up the physical button(s) for the video recording and photo shoots.
Use GPIO as trigger for recording start/stop (recording is active while GPIO is HIGH)
- System will record the video while the button is pressed. If you release it - the video recording will be stopped.
- For this scenario it is better to use the switch but not the button.
- One wire of the button should be connected to the GPIO selected, and another to the GND.
Use GPIO as button for recording start/stop (recording state toggles when GPIO is HIGH)
- System will start recording the video once the button is pressed and released.
- System will stop recording the video once the button is pressed and released.
- You can consider the button behavior in this mode as the "Record" button on the screen. Press once and release to start recording, press one more time to stop.
- One wire of the button should be connected to the GPIO selected, and another to the GND.
Use GPIO as button for photo shot
- System will shoot the photo when the button is pressed
- One wire of the button should be connected to the GPIO selected, and another to the GND pin.
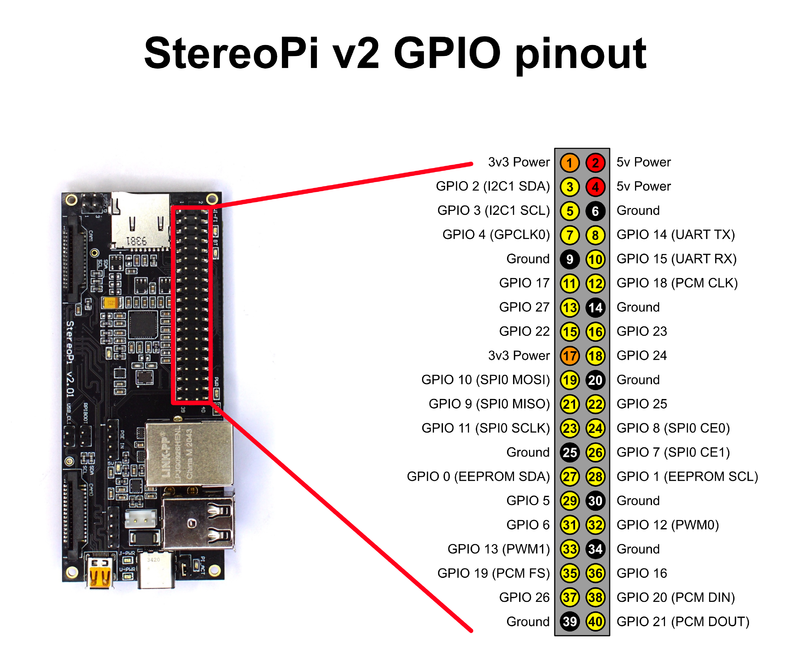
- You can find the button connection wiring example for GPIO 20 in this section of the Wiki: Screen and shot button installation
Here is the GPIO pinout of the StereoPi for your reference:
Secondary camera
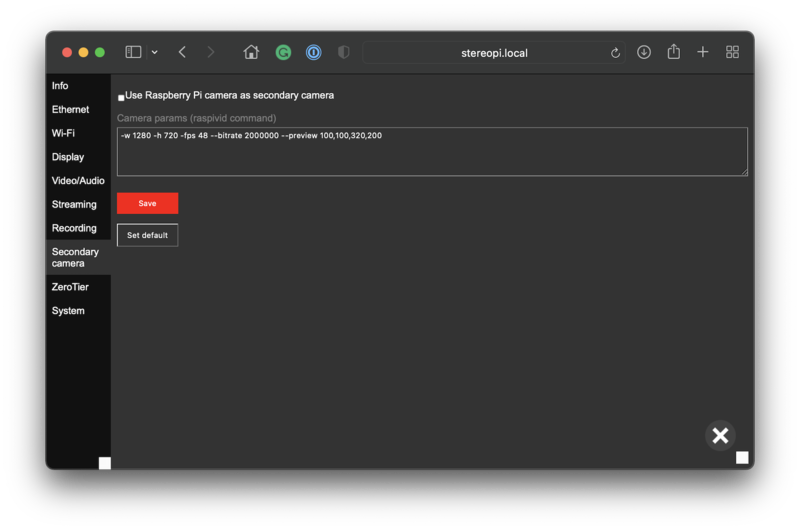
This tab is intended for advanced users as a part of the Cosmostreamer solution and provides an additional video stream for the operator of a cable cam or a drone.
ZeroTier
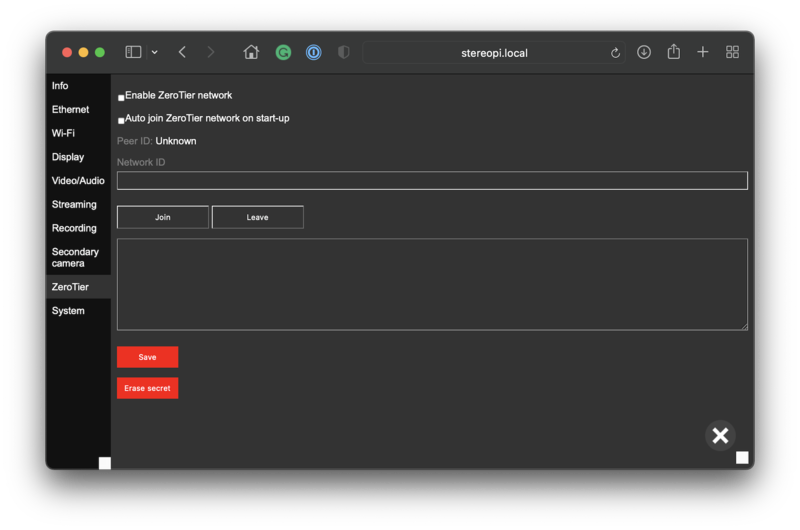
This section is for advanced users
Using the ZeroTier solution you can access your StereoPi over the Internet from anywhere in the world. When you set it up, ZeroTier will create VPN p2p connection between the StereoPi and your device (notebook, phone, or tablet) like they are connected to the same local network. The connection simplicity and low latency are the main reasons for using this approach. ZeroTier has a free plan (for up to 50 devices) and also an open-source self-hosted solution.
- You need an account at the [| ZeroTier]
- Put the "Network ID" in the first field.
- After the successful connection you can find the "PeerID" data on this page.
- "Erase Secret" button reset all information about the current connection and remove all session data.
System (Device Settings)
Firmware update
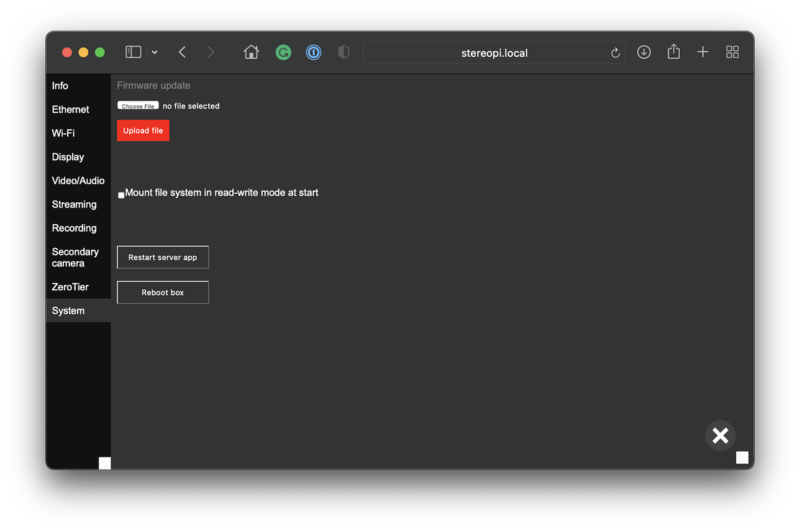
In this section, you can upload the firmware update.
The number of the latest SLP2 firmware version can be found here.
The latest update of SLP2 can be downloaded here.
Read-only file system settings
By default, the system partition is sot to the read-only mode. This will keep the system safe in case of an accident power-off. If you want to turn off the read-only mode, please check the option "Mount file system in read-write mode at start." Do not forget to turn it off after doing all your hacks. :)
Restart server app
This button initiates the full restart of the SLP2 server applications without the reboot of the device.
Reboot box
This button initiates the full reboot of the device.
Console
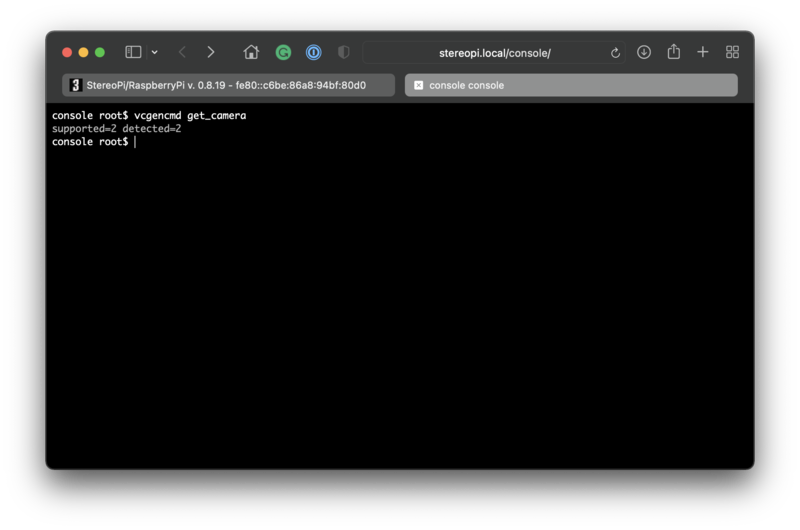
We have a simple web console onboard. It is helpful for fast access to simple information without an SSH connection.
Please note, this is not the SSH or hardware console, but the web implementation. Do not try to run commands, which require a lot of information (like top/htop, etc.) with the real-time refresh!
File manager
We have a Tiny File Manager onboard.
With this lightweight solution, you can easily download, upload and rename files.
USB storage
This menu option will open Tiny Fila Manager with the folder on the USB flash drive. You can find your photos and videos there.
MicroSD storage
This menu option will open the Tiny File Manager window with the folder on the micro SD card. You can find your photos and videos there.
