Difference between revisions of "SLP2 (StereoPi Livestream Playground v2)"
Realizator (talk | contribs) m (→Camera) |
Realizator (talk | contribs) m (→Camera) |
||
| Line 132: | Line 132: | ||
[[File:Camera-tab-camera-settings.png|none|800px|Camera tab, Camera settings]] | [[File:Camera-tab-camera-settings.png|none|800px|Camera tab, Camera settings]] | ||
| + | |||
| + | '''Cams detected x, supported x''' | ||
| + | |||
| + | At the very top of the menu, you can see the text "cams detected 2, supported 2" | ||
| + | |||
| + | '''"supported 2"''' means that the system is configured correctly and "knows" about 2 cameras. This literally means that the dt-blob.file in the /boot partition has information about this | ||
| + | |||
| + | '''"detected 2"''' means that the system detected both cameras. If you see "detected 1" or "detected 1", this usually means one of your cameras has connection issues. Check the ribbon cable connection on the StereoPi side and on the camera side. | ||
| + | |||
| + | '''Camera mode''' | ||
| + | |||
| + | In this drop-down list you can choose either "3D" or "2D". "3D" means stereoscopic mode, and "2D" regular mode using just a single camera. | ||
| + | |||
| + | '''3D mode''' | ||
| + | |||
| + | '''SBS''' means "side-by-side". In this mode, both images are stitched together by their sides - one at the left and another at the right. | ||
| + | |||
| + | '''TB''' means "top-bottom". In this case, images are stitched together by their top and bottom - one at the top, and another at the bottom. | ||
| + | |||
| + | |||
| + | '''Swap cams''' | ||
| + | |||
| + | By choosing this checkbox you will swap left and right images. This option affects both photos and videos. | ||
| + | |||
| + | '''Decimate''' | ||
| + | A tricky but useful feature for specific cases. | ||
| + | |||
| + | Imagine you have 1280x720 resolution for each camera. When you request the stereoscopic frame, the system takes 640x720 from the first camera by cropping it, and 640x720 from the second camera by cropping to. After that these "cropped" images are stitched together into one 1280x720 frame. I.e. in this case you are losing the field of view. This is "no decimate" mode, turned on by default. | ||
| + | If you turn on | ||
=== Image === | === Image === | ||
Revision as of 19:22, 5 October 2021
Contents
Quickstart
How to access the configuration file
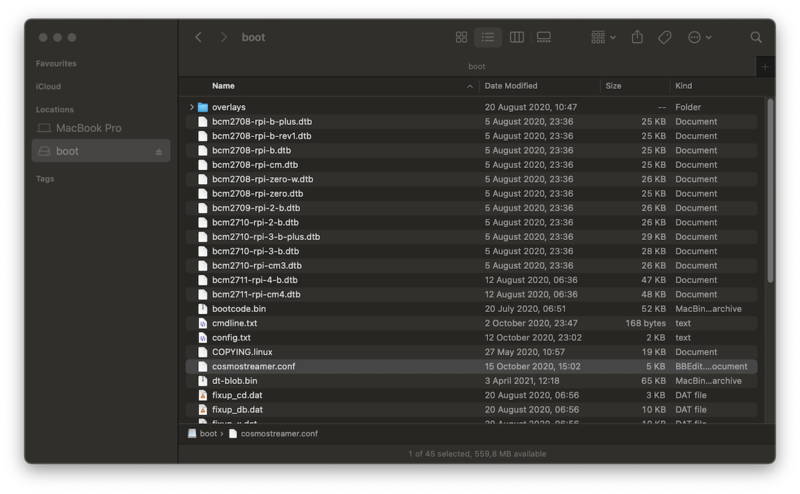
StereoPi settings are stored in the "cosmostreamer.conf" file. This file is located in the "boot" folder of the micro SD card with SLP2. You can connect the micro SD card to your computer using a micro SD cardreader, and this disk will be mounted to your computer.
Please remember to save your changes and do the correct ejection of this drive.
Connection setup
Ethernet
By default, you can use Ethernet connectivity out-of-the-box without any additional configuring. Plug in an Ethernet cable, and you are connected.
WiFi access point
SLP2 has pre-configured access point mode by default. That is after the first boot, you should see an access point named "Cosmostreamer." Use the "1234512345" password to access it. You can change the access point name and password in the configuration file "cosmostreamer.conf" in the /boot partition of the micro SD card (or eMMC). Here is how this section looks like:
# Wi-Fi access point interface
# disabled if empty, int - Internal Wi-Fi, ext - External USB Wi-Fi
ap_iface=int

# Wi-Fi access point SSID
ap_ssid="cosmostreamer"

# Wi-Fi access point password
ap_psk="1234512345"`
Examples:
To disable access point use:
ap_iface=
To enable access point using internal WiFi installed on CM4 use:
ap_iface=int
To enable access point using external WiFi (USB dongle) use:
ap_iface=ext
Note: please check that your USB WiFi dongle supports AP mode and that RaspiOS support the dongle's chipset!
WiFI connection to router
If you want StereoPi to connect to your WiFi router, you should disable the AP mode (see the previous section) first.
To do this, open the "cosmostreamer.conf" file in the /boot partition, and find this section:
# Wi-Fi access point interface
# disabled if empty, int - Internal Wi-Fi, ext - External USB Wi-Fi
ap_iface=int
Please change "ap_iface=int" to "ap_iface=". Now internal access point is disabled.
Now let's configure the access to your router.
Find this section in the configuration file:
# Wi-Fi network interface
# disabled if empty, int - Internal Wi-Fi, ext - External USB Wi-Fi
wifi_iface=

# Wi-Fi network SSID
wifi_ssid=""
# Wi-Fi network password
wifi_psk=""
Choose CM4's WiFi by modifying the first row to "wifi_iface=int" and add your access point credentials. For example, to connect StereoPi v2 to the Mars_colony_17 access point with the password total_recall! use these settings:
# Wi-Fi network interface
# disabled if empty, int - Internal Wi-Fi, ext - External USB Wi-Fi
wifi_iface=int

# Wi-Fi network SSID
wifi_ssid="Mars_colony_17"
# Wi-Fi network password
wifi_psk="total_recall!"
How to access StereoPi
Under Windows10 and MacOS you can type this address in the browser
stereopi.local
If you are using the StereoPi access point, you can use direct access to this address:
192.168.50.1
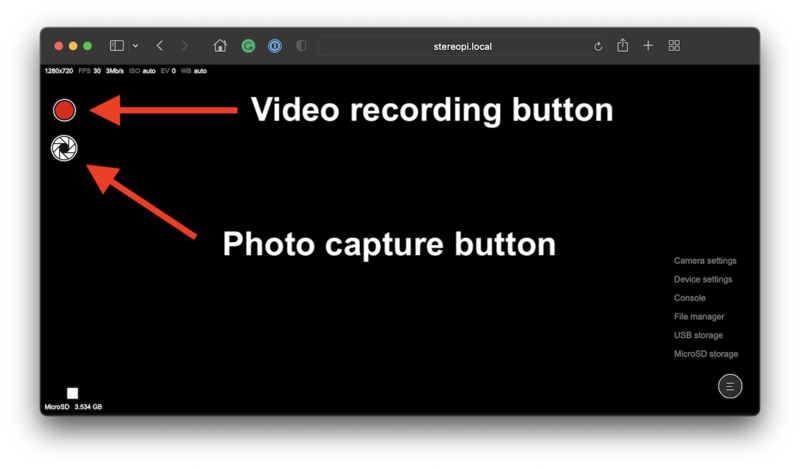
Making photo/video
Accessing photo/video
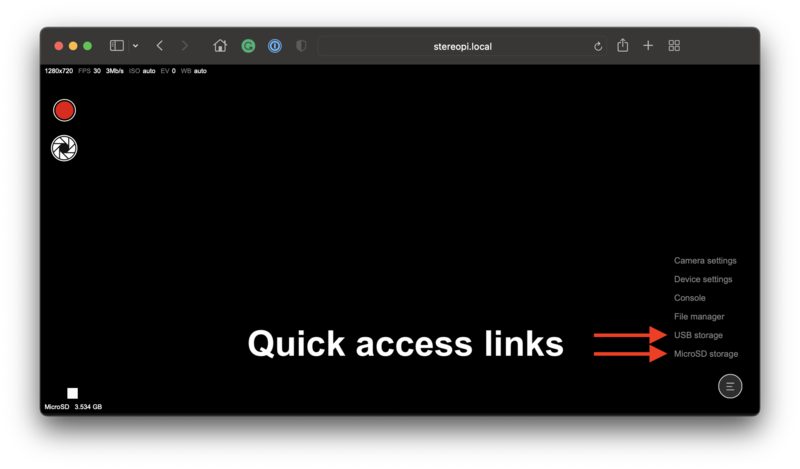
To find all photos and videos click on the menu icon at the right bottom corner and choose "Micro SD storage". You'll see the File Manager window. All your images and videos are saved in the DCIM folder.
If you configured SLP2 to store files at the USB dongle, please choose "USB storage" in this menu.
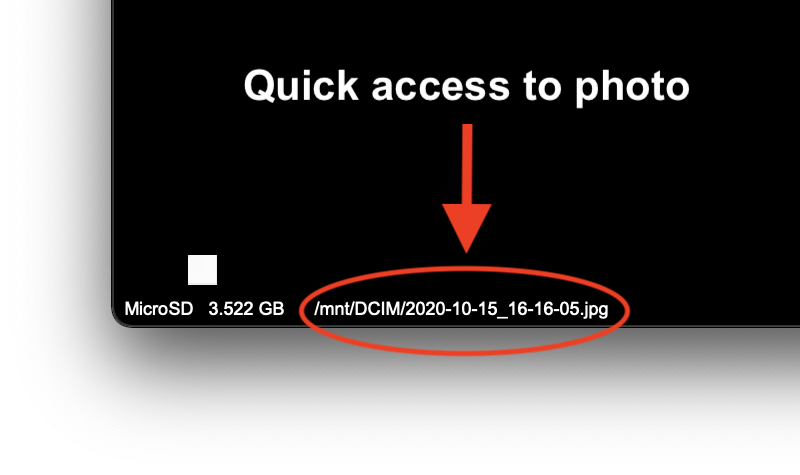
If you want to take a quick look at the latest image captured, you can use the direct link to it.
This link appears at the bottom-left corner right after the image capture. Click on it will open a new browser tab with the taken image.
Updating SLP2
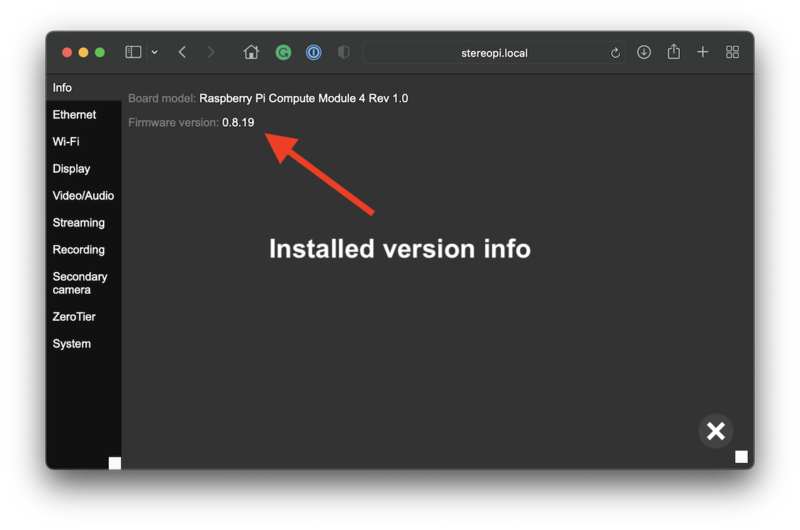
The latest version of SLP2 firmware is 0.8.19.
Link to the update file 0.8.19 (11.3Mb)
Unzip before the uploading to the StereoPi.
To find the current version installed go to "Menu -> Device settings -> Info".
To update SLP2 to the latest version go to "Menu -> Device settings -> System".
Menu structure
Camera settings
Camera
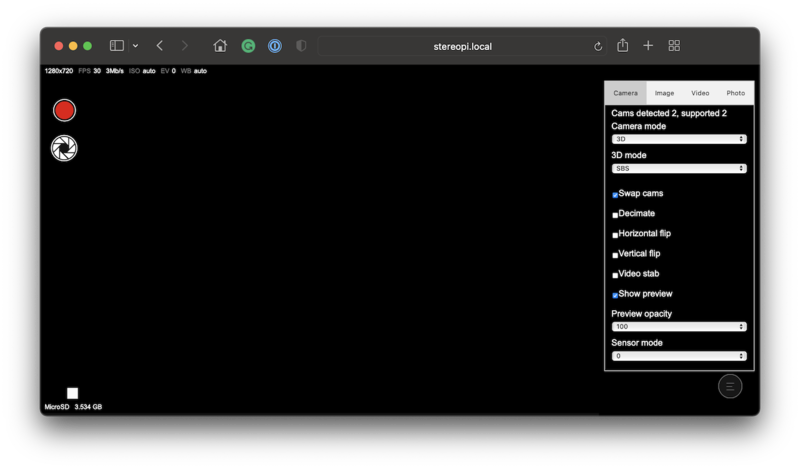
Cams detected x, supported x
At the very top of the menu, you can see the text "cams detected 2, supported 2"
"supported 2" means that the system is configured correctly and "knows" about 2 cameras. This literally means that the dt-blob.file in the /boot partition has information about this
"detected 2" means that the system detected both cameras. If you see "detected 1" or "detected 1", this usually means one of your cameras has connection issues. Check the ribbon cable connection on the StereoPi side and on the camera side.
Camera mode
In this drop-down list you can choose either "3D" or "2D". "3D" means stereoscopic mode, and "2D" regular mode using just a single camera.
3D mode
SBS means "side-by-side". In this mode, both images are stitched together by their sides - one at the left and another at the right.
TB means "top-bottom". In this case, images are stitched together by their top and bottom - one at the top, and another at the bottom.
Swap cams
By choosing this checkbox you will swap left and right images. This option affects both photos and videos.
Decimate A tricky but useful feature for specific cases.
Imagine you have 1280x720 resolution for each camera. When you request the stereoscopic frame, the system takes 640x720 from the first camera by cropping it, and 640x720 from the second camera by cropping to. After that these "cropped" images are stitched together into one 1280x720 frame. I.e. in this case you are losing the field of view. This is "no decimate" mode, turned on by default. If you turn on
