Difference between revisions of "StereoPi v2 Camera Kit Guide"
Jump to navigation
Jump to search
Realizator (talk | contribs) m (→Basic assembly) |
Realizator (talk | contribs) m (→Camera mounting plate preparation) |
||
| Line 6: | Line 6: | ||
=== Camera mounting plate preparation === | === Camera mounting plate preparation === | ||
| + | |||
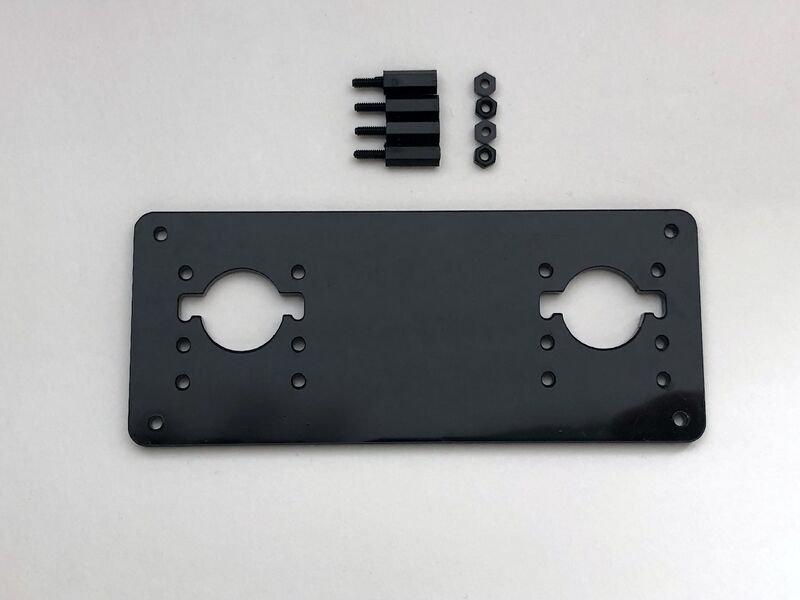
| + | # Prepare the camera mount plate, four nuts, and four 10mm spacers | ||
| + | |||
| + | [[File:Stereopi-v2-camera-kit-3.jpg|none|800px|Front plate, 10mm spacers and nuts]] | ||
| + | |||
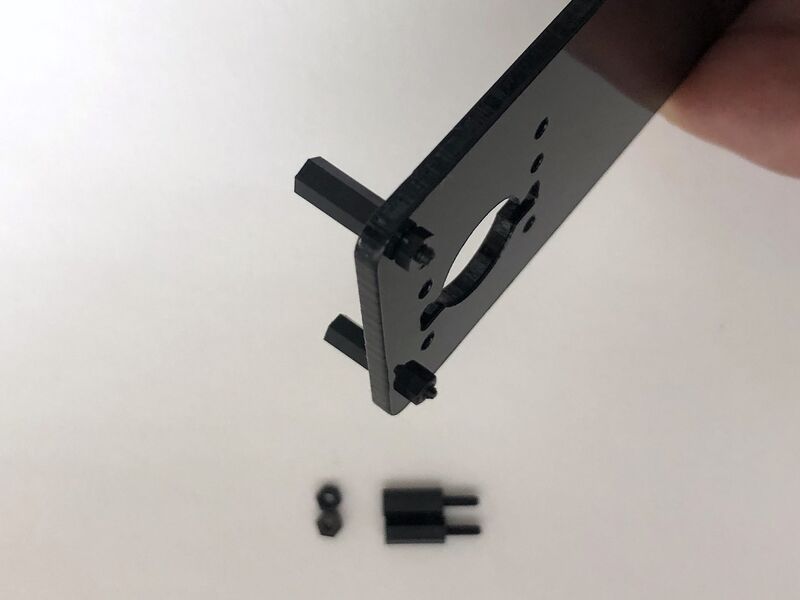
| + | # Install the spacer to the hole in each corner and fix it with the nut | ||
| + | |||
| + | [[File:Stereopi-v2-camera-kit-3-1.jpg|none|800px|10mm spacers installation]] | ||
| + | |||
=== Cameras installation === | === Cameras installation === | ||
=== CM4 installation === | === CM4 installation === | ||
Revision as of 16:06, 28 September 2021
Contents
Basic assembly
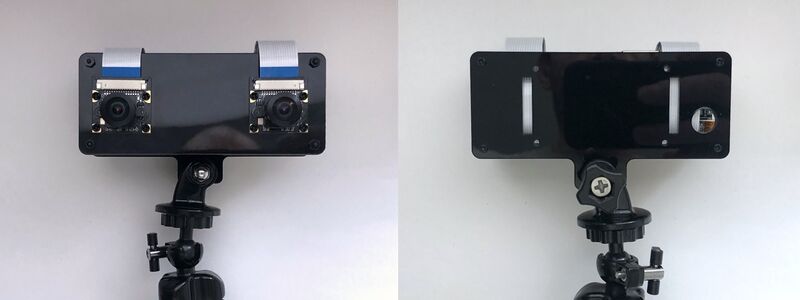
Following this section of the guide, you can assemble the basic camera setup without a screen and a button. This assembly is useful for the OpenCV experiments.

Camera mounting plate preparation
- Prepare the camera mount plate, four nuts, and four 10mm spacers

- Install the spacer to the hole in each corner and fix it with the nut

Cameras installation
CM4 installation
StereoPi v2 power jumper installation
StereoPi v2 installation
Back plate installation
Tripod mount installation
Advanced assembly
In this section, we'll review a few cameras installation options, as well as 2" IPS screen installation and a shot button. This assembly is suitable for the SLP2 image and stereoscopic photo/video capture.