The Basics
HOT!!! The VERY first steps video tutorials
How to insert RPi Compute Module
While inserting Raspberry Pi Compute Module (CM) in to the SteroPi, first insert it in the SO-DIMM connector at a 45-degree angle and firmly press down until you hear a “click”. If you will not insert it correctly (with a 45 degree angle), you may still hear a “click”, but some CM contacts may not make contact with the SO DIMM connector pins. If the device is powered up in this configuration, it will either will not boot, or will die a painful death! So, do yourself a favor and remove and install the StereoPi with a 45 degree angle!
How to prepare Raspbian image
You may download latest Raspbian image and write it on MicroSD card. To add support of both cameras you need just to put dt-blob.bin file in a “boot” partition.
This dt-blob.bin file is available here in our Wiki
You can also use our S.L.P. Raspbian image
or our OpenCV Raspbian Image (link in this article Python and OpenCV first steps)
eMMC Compute Module (non-"Lite" editions)
If you are using eMMC-equipped Compute Module, you can not work with the micro SD. Both micro SD and eMMC use the same SDIO lines (as in reference schematic of RPi Development Board). So if you insert micro SD and install eMMC equipped Compute Module, micro SD and eMMC will conflict, and system won't boot. For upload Linux image to eMMC please follow this guide: Upload image to EMMC over Micro USB (CM1, CM3 non-Lite).
And here is a brief video guide for you:
Flashing RPi Compute Module’s eMMC via StereoPi
How to connect cameras
While connecting camera ribbons, the first step is PULLING black the fixator up 4-5 mm. After that insert camera ribbon by BLUE side to BLACK fixator. Check that the cable is fully inserted at a 90 degree angle. After that push the black fixator down to secure the ribbon.
How to connect power
Important. Please let me dispel the myth: The MicroUSB on StereoPi is not for power as with the classic RaspberryPi.
The MicroUSB on StereoPi is intended for uploading the eMMC firmware. Connecting the MicroUSB to StereoPi will place StereoPi in a special mode. There’s also one backdoor feature the MicroUSB permits, usb-client mode. In this mode LAN9513 chip is physically disconnected from CM USB, so LAN and USB are disabled.
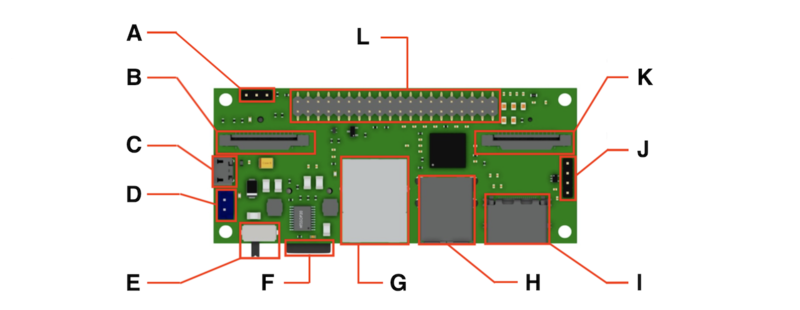
- There is a two-pin connector on board for connecting power supply. It is marked by "D" on this image:

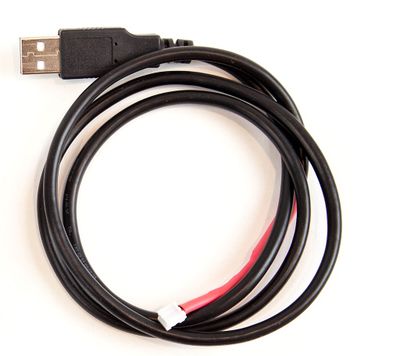
- Included in your kit is a USB A power cable, with a special connector to power the StereoPi.
As a rule, this cable is included in our Starter and Deluxe kits.

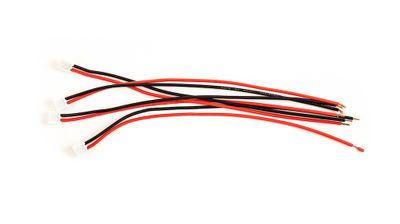
- If space is tight inside your robot or enclosure, another cable, like this one, can be used to power the StereoPi instead of the USB cable. You can solder power source you wish (like BEC on your RC model), or assemble USB power cable for on-table experiments.

How to install cameras to support plates

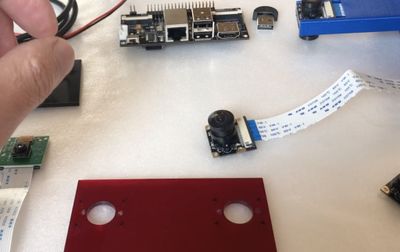
Installation of a basic V1 and V2 cameras is obvious, but you might have some questions about wide angle cameras installation.
You need M2 (2mm diameter) screws. Both Raspberry Pi cameras and StereoPi have a M2 holes.
It is recommended to use nylon (not metal) screws. Metal screws or nuts could interfere with some of the components on the camera's PCB. In this case, the camera is detected but unable to capture any video.
Here is a brief video of this process:
How to power up the StereoPi
- If you are using power cable, you need to turn on power switch.
- If you are using MicroUSB (advanced mode for firmware upload, Undeclared feature: usb client mode ), power switch is ignored. In this case another powering logic is used. Device will be powered on as soon as you connect MicroUSB cable. Please notice, that in this case USB and LAN are disabled!
Quick equipment test
If you are using S.L.P. Raspbian image:
- Insert MicroSD in your cardreader. You'll see "BOOT" disk in your connected storage list.
- Open "stereopi.conf" file.
- Find row "video_mode=2D", change it to "video_mode=3D". Save file.
- Insert your MicroSD to the StereoPi.
- Connect 2 cameras and HDMI monitor. Power on your StereoPi.
- If you see images from both cameras on your HDMI monitor, everything is Ok.
If you are using fresh-cooked Raspbian image, downloaded from RaspberryPi.org, go this way:
- We suggested you've already added "dt-blob.bin" to your BOOT partition, as mentioned here in our Wiki.
- Connect 2 cameras to your StereoPi, and power it on.
- Open console.
- Run "raspistill -cs 0". You will see 5 seconds preview from your first camera.
- Run "raspistill -cs 1". You will see 5 seconds preview from your second camera.
Please notice, you can do this preview test in both GUI Raspbian mode and console (non-GUI) modes.